Luma AI is revolutionizing how we create videos with their powerful Dream Machine tool. This advanced AI tool can transform text descriptions into high-quality videos in just minutes. Let’s explore Luma AI and learn how to use the Dream Machine tool to turn ideas into amazing videos!
Dream Machine – Creating Videos Has Never Been Easier
Dream Machine is a deeply trained AI model on video data, enabling it to understand and realistically recreate motion, characters, and scenes. Simply input a basic text description, and Dream Machine will automatically generate a vibrant 5-second video with smooth motion and cinematic angles.
See more:
Here are the highlights of Lumalabs AI
- Ease of Use: The intuitive and user-friendly interface requires no specialized skills.
- High-Quality Video: Produces videos with standard resolution and frame rates (24-30fps), ensuring excellent image quality.
- Character and Environment Interaction: The Dream Machine understands how characters, people, and animals interact with their surroundings, creating realistic and engaging videos.
- Smooth Motion and Cinematic Angles: Generates natural movements and diverse camera angles, enhancing the video’s aesthetic appeal.
- Diverse Customization: You can customize the
The guide on how to use Lumalabs AI
1️⃣ Visit the Website: Go to the Luma AI homepage and sign up for a free account or log in if you already have one.
2️⃣ Explore the Interface: Get familiar with the Luma AI interface, and explore the various features and subscription plans.
3️⃣ Enter Text Description: In the Dream Machine section, enter a detailed description of the video you want to create, including characters, actions, settings, etc.
4️⃣ Upload Images (Optional): You can upload images to serve as inspiration for character design.
5️⃣ Create Video: Click the “↑” icon and wait a moment for the Dream Machine to generate the video for you.
6️⃣ View and Save: Once completed, you can preview the video, save it, or download it to share.
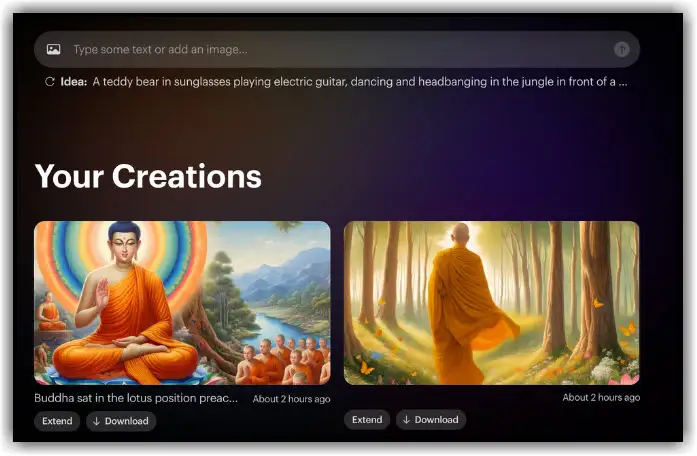
How to Create a Video on Dream Machine-Lumalabs AI
From Images:
- Upload Image: Select a JPG, JPEG, or PNG image by clicking the image icon 🖼️ on the video creation page.
- Add Description (Optional): Provide a brief description of the scene in the image.
- Enable “Enhance Prompt” (Recommended): Simply describe what you want to happen in the video. For example, “the red car is driving on the road” (if the image is of a car). Focus on the movements you want to see in the video.
- Do Not Use “Enhance Prompt” (If Necessary): Provide a more detailed description of the image and what you want to happen. Note that the video may have little or no movement if “Enhance Prompt” is not enabled.
- Create Video: Click the “↑” icon and wait for Dream Machine to create the video for you. (The wait time can be up to several hours).

From Text:
- Enable “Enhance Prompt” (Recommended): Simply enter a short description, such as “a teddy bear swimming underwater.” Dream Machine will automatically add details to create a richer video.
- Do Not Use “Enhance Prompt” (If Necessary): Provide a more detailed description of the scene and desired actions (3-4 sentences). For example: “In a melancholic, nostalgic setting, a young man sits on a tree stump in the forest, surrounded by warm autumn leaves. He wears a brown coat, a dark shirt, and blue jeans, with his fingers swiftly moving over the strings of an acoustic guitar.”
Tips for Creating Professional Videos
To make your video more impressive and professional, pay attention to the following elements:
Camera Movements
- Rotation: “The camera rotates around the character,” “Slowly rotate to reveal the entire cityscape.”
- Movement: “The camera follows the character,” “Slowly ascend to create an aerial effect.”
- Zoom In/Out: “Zoom in on important details,” “Gradually zoom out to reveal the entire scene.”
- Angles: “Bird’s-eye view,” “First-person perspective (as if seeing through the character’s eyes).”
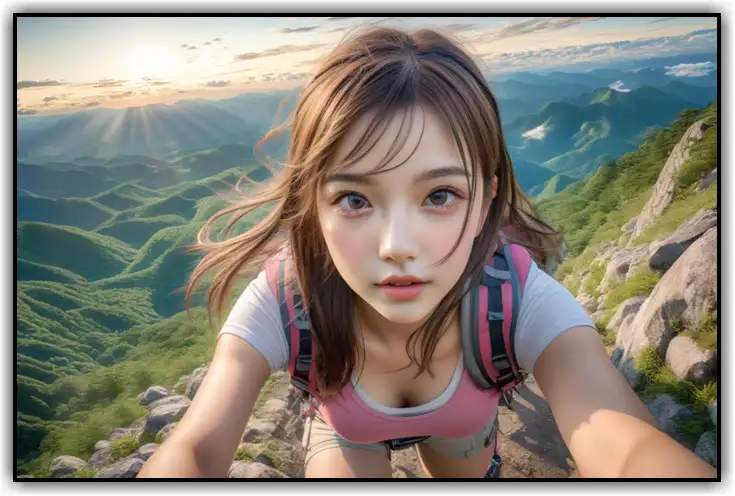
Tip: Try combining different movements, such as rotating while moving, to create unique and captivating shots.
Actions and Movements
- Characters: “The girl dances gracefully,” “The boy runs swiftly forward.”
- Objects: “The leaf falls gently,” “The fire crackles and burns.”
- Environment: “The waves ripple gently,” “The clouds drift across the sky.”
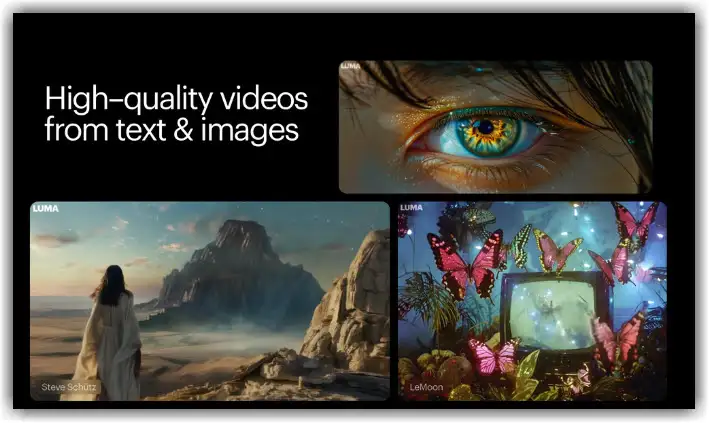
lumalabs ai high quality videos from text and images
Tip: Use descriptive words to vividly portray actions and movements. For example, instead of “the girl dances,” try “the girl dances gracefully like a professional ballerina.”
Object Characteristics:
- Shape: “The slender antique vase,” “The chubby penguin.”
- Color: “The vibrant red rose,” “The shiny blue sports car.”
- Material: “The soft silk dress,” “The rough brick wall.”
- Lighting: “Sunlight streaming through the window,” “Flashing neon lights.”
Tip: Describe lighting and shadows in detail to add depth and realism to objects.
Setting:
- Location: “The tropical rainforest,” “The modern city at night.”
- Time: “Early morning mist,” “Romantic sunset.”
- Weather: “Heavy rain,” “Bright golden sunshine.”
- Atmosphere: “Festive and bustling atmosphere,” “Peaceful countryside ambiance.”
Tip: Use evocative language to describe the setting. For example, “a star-studded night sky” instead of just “the night sky.”
Practical Filmmaking Techniques
Shot Sizes
- Close-Up (CU): Zoom in on the face to capture the character’s emotions or the smallest details of an object.
- Extreme Close-Up (ECU): Zoom in as much as possible! Magnify tiny details like a teardrop or a wrinkle to increase drama.
- Medium Shot (MS): Capture the subject from the waist up, showing both the character and a bit of the surrounding context.
- Medium Close-Up (MCU): Frame the subject from the chest up, creating an intimate feel, as if having a direct conversation.
- Full Shot (FS): Capture the entire body, showing the character’s full stance and actions within the setting.
- Long Shot (LS) / Wide Shot (WS): Display vast landscapes, large cities, making people appear small against nature.
- Extreme Long Shot (ELS): The subject appears as a tiny dot in a vast space, conveying feelings of isolation and loneliness.
- Establishing Shot: Introduce the setting, letting the audience know where the story takes place.
- Two-Shot: Show two people together, highlighting their relationship and emotions.
- Over-the-Shoulder: View over one character’s shoulder to see the other character, commonly used in dialogues.
Camera Movements
- Pan: The camera stays in place but moves horizontally, scanning the scene like a radar.
- Tilt: The camera stays in place but moves vertically, either up or down, creating a sense of surprise or suspense.
- Dolly: The camera moves smoothly on a track, moving towards or away from the subject.
- Tracking: The camera follows the moving subject, similar to documentary filming.
- Crane: The camera moves down from a high point, providing a grand, panoramic view.
- Handheld: The camera shakes with the cameraman’s movements, creating a realistic, tense feeling.
- Steadicam: The camera is mounted on the cameraman, moving smoothly as if gliding in the air.
- Zoom: Quickly switch from close-up to wide shot without moving the camera.
- 360-Degree: The camera rotates around the subject, providing a comprehensive view.
Camera Angles
- High Angle: The camera looks down on the subject, making them appear small and weak.
- Low Angle: The camera looks up at the subject, making them appear tall and powerful.
- Dutch Angle: The camera tilts to one side, creating a sense of imbalance and chaos.
- Bird’s Eye: The camera shoots from a very high position, like from an airplane, showing a broad overview.
- Worm’s Eye: The camera is placed close to the ground, looking up, making everything appear tall and overwhelming.
Special Techniques
- POV (Point of View): See the world through the character’s eyes, immersing in their perspective.
- Selective Focus: Blur everything around, focusing sharply on the subject.
- Rack Focus: Shift focus from one object to another, guiding the viewer’s attention.
- Timelapse: Speed up time to show changes over days or months.
- Slow Motion: Slow down moments, enhancing drama and emotion.
- Freeze Frame: Stop the action suddenly, emphasizing an important detail.
- Drone: Fly above for an aerial view, capturing stunning panoramas.
Immersive Styles
- GoPro: The camera is attached to the person, recording what they see, creating a first-person experience.
- 360-Degree: Capture the entire surrounding space, allowing the viewer to explore every angle.
Additional Tips:
- Combine multiple descriptive elements to create unique videos.
- Experiment with different visual styles.
- Use the “Extent” feature to extend the video by an additional 5 seconds (requires one creation slot).
Notes:
- Unused creation slots will not carry over to the next month.
- Free users have a daily limit on the number of creations.
Frequently Asked Questions
Why is my video not yet created or still “in queue”?
Currently, the number of free video creations may be limited, and paid accounts will be prioritized.
What are the benefits of a paid subscription?
Faster video creation, commercial use rights, and downloading videos without a watermark.
I encountered the error “Error generating video, please try again. (Network Error).” What should I do?
Try changing the image to JPG, JPEG, or PNG format and reduce the image size.
Can I create videos longer than 5 seconds, add exclusions to the description, or change the aspect ratio?
These features will be updated soon.


